A List of Every Single Thing I Bought for Cycling
I’ve always been a pretty frugal person. So it came as a bit of a shock when I realised how many cycling accessories I needed, especially when I had already spent almost $2000 on a new road bike.
As a beginner cyclist, it also took me quite a while to assemble my “complete” kit. I had to figure out what I needed and what I didn’t, by doing online research, observing fellow cyclists, and talking to other TDC participants.
Below is a complete list of every single thing I bought for my new cycling hobby. There were no impulse purchases - I would classify every single item as essential, or at least very beneficial to my riding experience.
Clothing
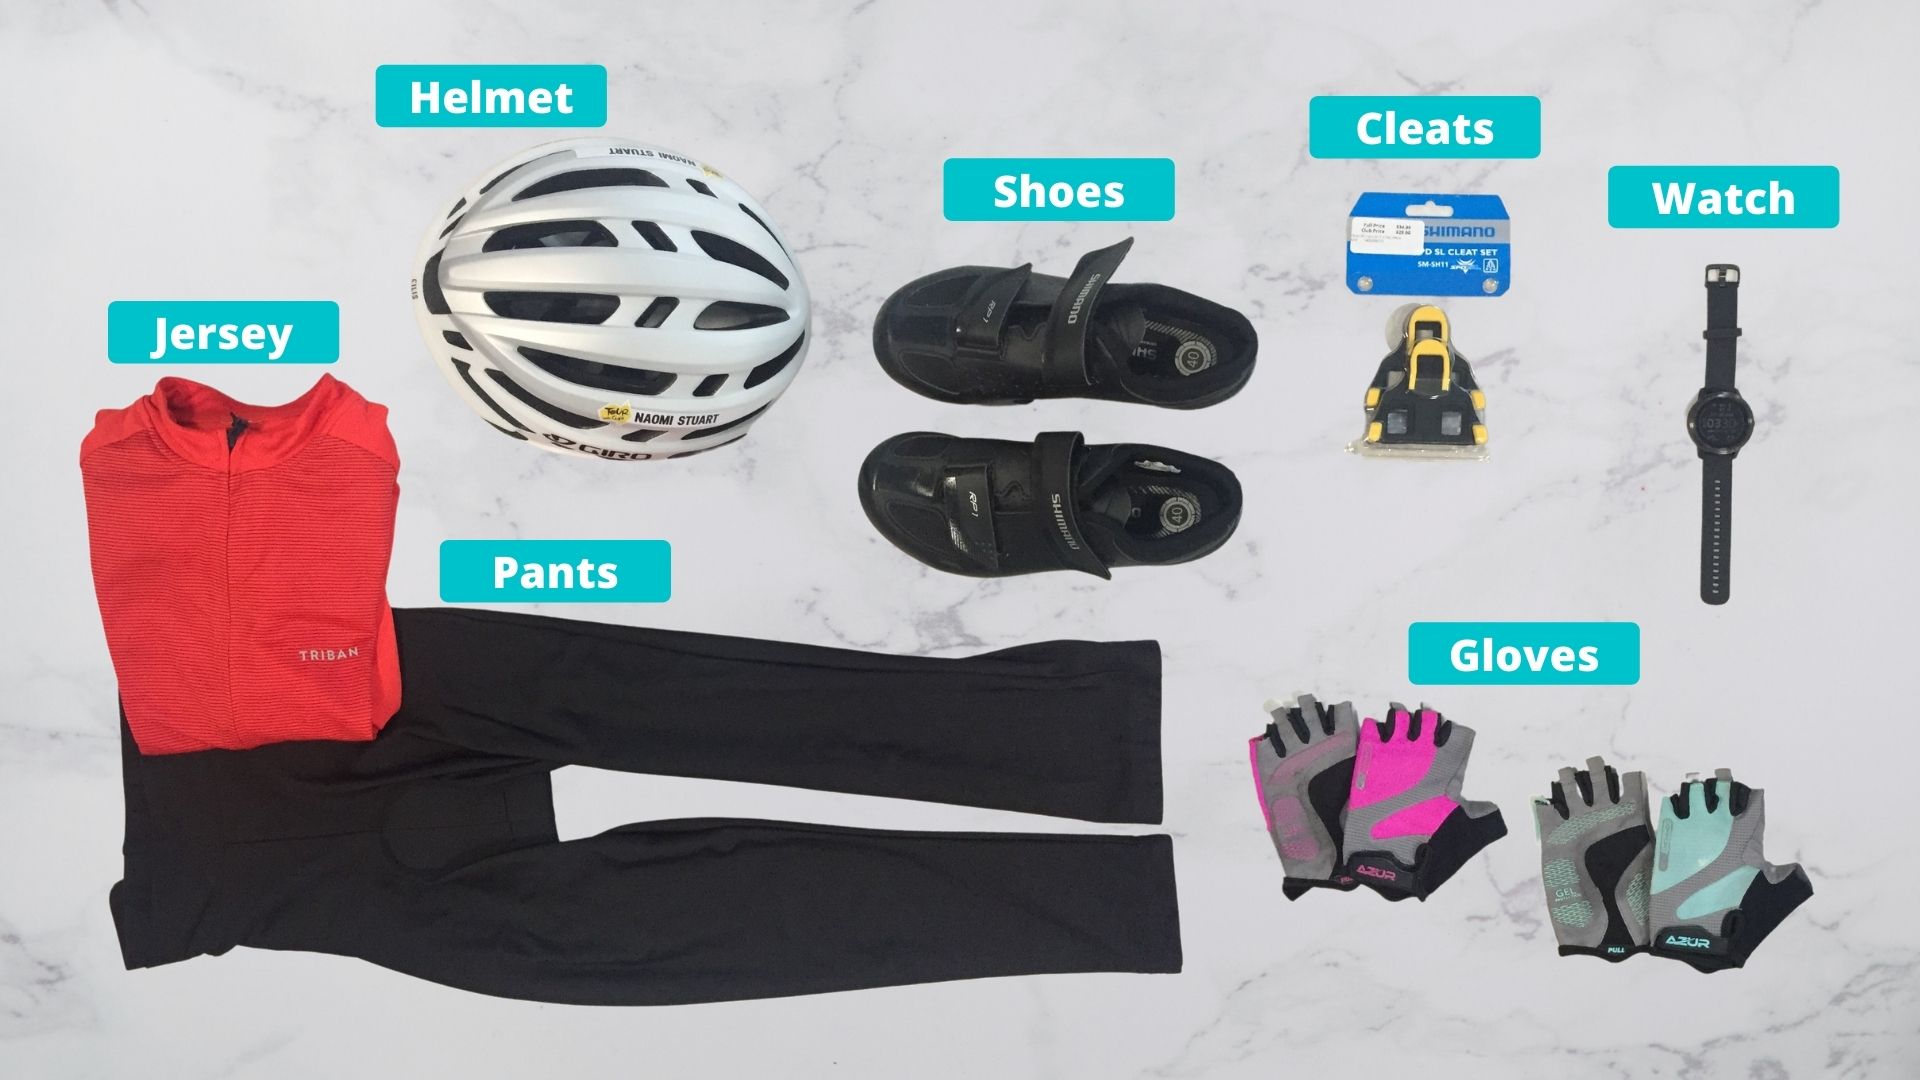
-
Helmet (Giro Agilis MIPS): Throughout most of my training I wore a $20 helmet from Kmart. Truth be told, it served me quite well. Observing all the fancy helmets my fellow TDC riders were wearing, however, made me self-conscious and filled me with envy. I realised I didn’t want to be the one standing out with the cheapest, ugliest helmet. And given all that I had already spent on buying a new bike and other accessories, I reasoned it made no sense to sabotage the rest of my pretty gear with a bad helmet. So I bought a new helmet, choosing the Giro Agilis model as it was reasonably priced and felt very comfortable. Its integrated MIPS (Multi-directional Impact Protection System) is designed to reduce harmful rotational forces transmitted to the brain in certain impacts.
-
Gloves (Azur S60 short finger women’s gloves): When I first started riding, I observed that almost everyone wore gloves. I was perplexed and didn’t see the point at all - until the day when I first rode in the rain. While my gloved-up colleagues continued merrily in the wet, I struggled to maintain any grip on my handlebars. I got myself a pair of gloves the following day, and was immediately astounded by the difference they made to my riding experience, even in the dry. Now I cannot imagine riding without gloves. They massively improve comfort and grip (our hands sweat during riding, a lot!), with the added bonus of protecting our hands in case of falls.
-
GPS sports watch (Garmin Vivoactive 3): The majority of TDC riders record their activities on either a Garmin or Wahoo bike computer. I started off by simply recording my rides using the Strava app on my phone, though that was pretty inconvenient for two main reasons. Firstly because the auto-pause feature seldom worked properly, so all the traffic or cafe stops would drag my recorded average speed down considerably, unless I went to the trouble of manually pausing the recording (which caused another issue as I would then almost always forget to restart the activity). Secondly, I didn’t have a phone mount for my bike, so I kept my phone in my jersey pocket, meaning I never had any real-time awareness of my current distance or speed. I contemplated buying a bike computer, but they are expensive. I compromised by getting a Garmin GPS sports watch instead, which had the benefit of allowing me to record my walks, runs and swims as well. The watch also monitors my heart rate, and automatically uploads all activities to my Strava account.
-
Jersey (Triban long-sleeved road cycling jersey): All TDC riders receive a training jersey once they sign up, plus another jersey to wear on tour. However, we don’t receive the second jersey until just before tour, since the organisers have to finalise all sponsor logos. During training, I found it difficult to always wash everything in time for the next session, so I bought myself a second jersey.
-
Cycling pants (Triban 3/4 cycling crop bottoms): Similarly, we don’t receive our second pair of official TDC bib shorts until just before tour. I bought a pair of 3/4 cycling pants early on in my training, and found them very useful in protecting my knees during my initiation into clipless pedals, when I had frequent falls.
-
Shoes (Shimano RP1): Road cycling shoes for use with SPD-SL cleats.
-
Cleats (Shimano SH11 yellow): Road cleats for use with SPD-SL pedals, with a beginner-friendly 6 degrees of float.
Bike Components & Accessories
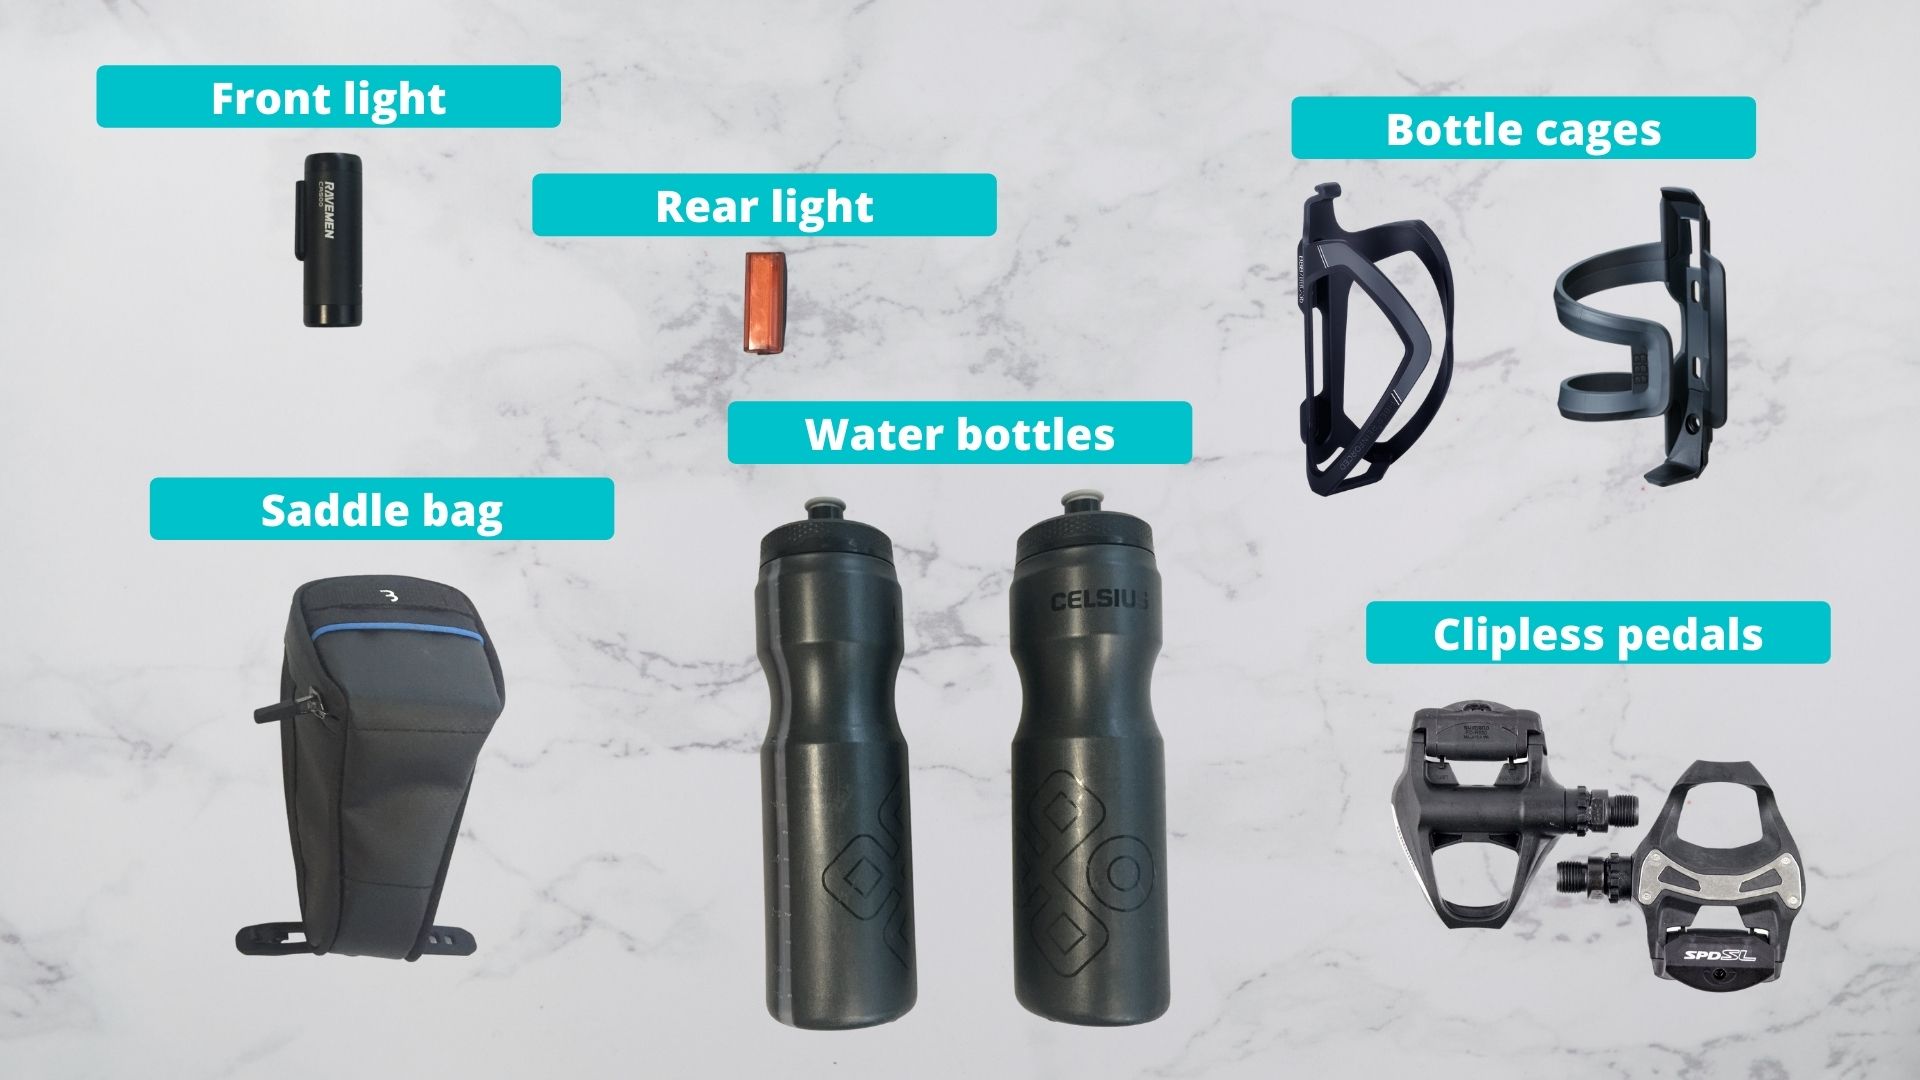
-
Lights (Ravemen CR500 front light & TR20 rear light): With training rides typically rolling at 6 am, I have to leave home as early as 4:40 am to ride to the start point in time for the briefing. Lights are therefore an essential accessory. I’ve been caught out a few times by a dying battery, and I’ve since learnt that the operating mode of the light makes a huge difference to its run time. For instance, selecting the highest brightness level (500 lumens) on my front light results in only 1.6 hours of run time, but selecting the “rapid flashing” mode (50 lumens) provides 30 hours of run time. I find the highest brightness level is required on unlit paths, so the trick is to remember to switch to a more energy-efficient mode once I reach more well-lit roads.
-
Clipless pedals (Shimano R550 SPD-SL): My bike came with flat pedals so I had to purchase clipless pedals separately. See my previous post detailing my experiences with clipless pedals.
-
Saddle bag (BBB Curvepack medium): To carry various tools and spares in case of a puncture or other mechanical issue. On TDC training rides we’re required to carry a spare tube and CO2 canisters (or mini pump).
-
Bottle cages (BBB FlexCage & BBB Dual Attack Side Cage): It is a TDC requirement that we have not one but two bottle cages installed on our bikes. The reason I didn’t get two identical cages relates to my bike’s small frame size. I have a standard top-loading cage on the down tube but a side-loading cage on the seat tube, a configuration which makes it easier to access my water bottles.
-
Water bottles (Celsius Squeeze 800mL): I had plenty of water bottles at home, but none with sports caps, which are essential if you want to drink with only one hand. So I bought two new 800mL water bottles, not realizing until later they were quite a bit larger than typical cycling bottles, which are usually 500-600mL. With two full 800mL bottles, I was adding more than 1.6kg to my system weight - a not insignificant amount, especially for sustained climbs. So I usually only fill one and a half bottles, especially if I know there will be water fountains along the route.
Saddle Bag Items
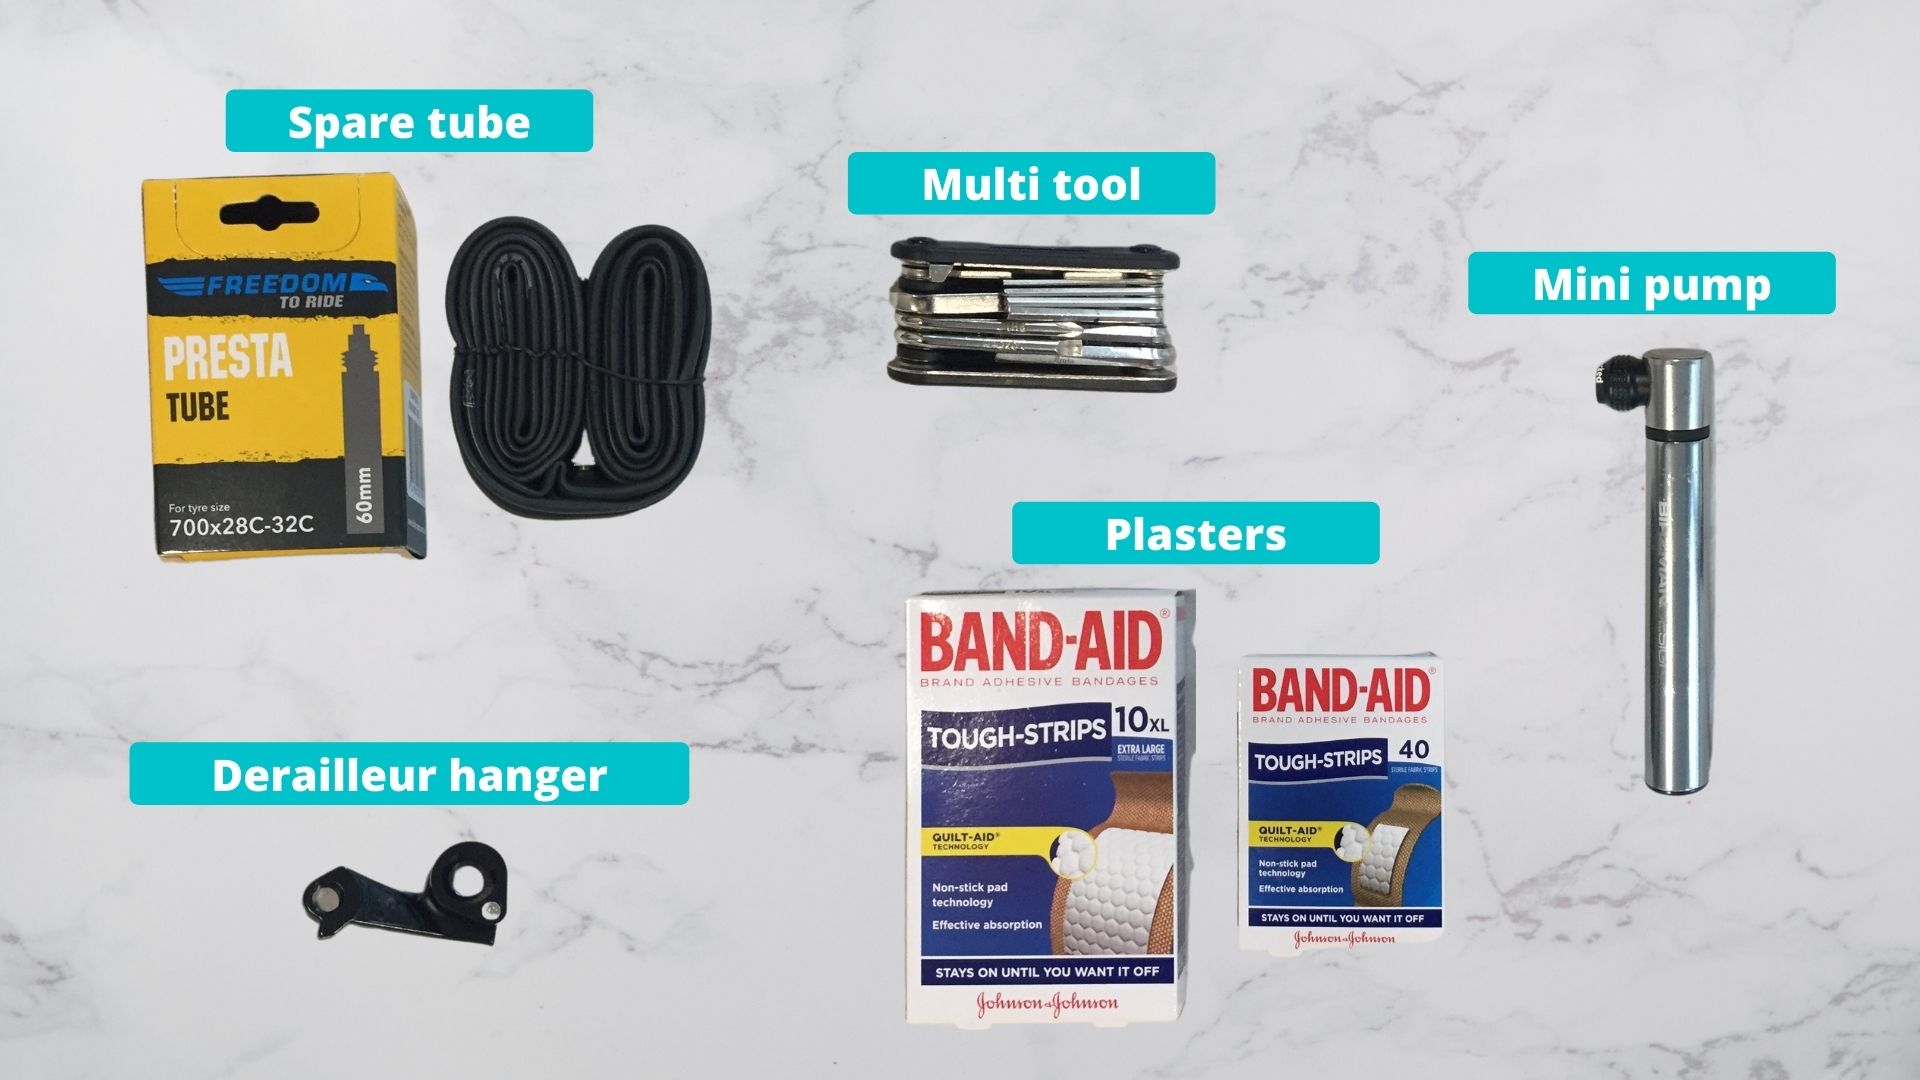
-
Spare tube (Freedom to Ride Presta tube 700 x 28-32 60mm): On training rides we are required to carry a spare inner tube in case of punctures. I must say I didn’t know a tyre from a tube before I started riding, and only learnt the difference by doing a quick google. When it came time to procure a spare tube, I again had to consult google to decipher what all the different numbers meant. I learnt that the tube size must be correctly matched to the tyre size, and there are four main measurements and factors to consider - the tyre diameter and width, plus the valve type and length. In my case, I have 700C diameter road tyres that are 28mm wide. (As an aside, the “C” in 700C is apparently a historical remnant that doesn’t actually mean anything. “700” also only refers to the rough, not exact, outer diameter of the tyre, as this varies greatly depending on the tyre type and tread pattern.) The valve type is Presta, and I chose a valve length of 60mm just to be safe (the next length down was 48mm), to ensure the valve is long enough to protrude through the wheel rim and attach a pump to.
-
Mini pump (Birzman Mini-Apogee Snap-It): To inflate a new inner tube on the go in case I get a puncture. My mini pump only weighs 75 grams and easily fits into my saddle bag. It’s not designed for day-to-day use (I have a separate floor pump for that). An alternative to mini pumps are CO2 canisters, which provide much more rapid inflation. However the canisters are single-use, making them more expensive in the long run, and not environmentally friendly. In addition, if you’re unlucky and get multiple punctures, you can run out of canisters, but you’ll never run out of air if you use a mini pump!
-
Multi tool (DAWAY 16-in-1): True story - I once had a clipless pedal-induced crash which twisted my seat post 30 degrees to the right and rendered my bike all but unridable. I was out on my own, 20km from home, and had to catch the train back. Maddeningly, the problem could have been so easily fixed if I had a multi tool with me. From that day on, I vowed never to go on a ride without bringing a multi tool in my saddle bag.
-
Plasters (BAND-AID tough-strips): I learnt my lesson after falling one too many times early on in my training, where I was caught out with a bleeding elbow or knee but no plaster.
-
Spare derailleur hanger: A derailleur hanger is the part that connects the rear derailleur to the bike frame. The hanger is designed to bend or break in the event of a crash, to minimise damage to other drivetrain components. The frustrating thing about derailleur hangers is that they’re shaped uniquely for each bike frame, so you can’t just go to a random bike shop and expect to find the exact model you’re after. A couple years ago, a TDC rider’s derailleur hanger was damaged while on tour, and despite having access to a well-stocked literal truck-load of spare parts and components, the tour mechanics weren’t able to fix the bike, because they didn’t have the exact model of hanger required. That very unlucky rider had no choice but to sit out the rest of the tour in the support car. As a result, TDC organisers now recommend all riders bring along their own spare derailleur hanger.
Maintenance & Cleaning
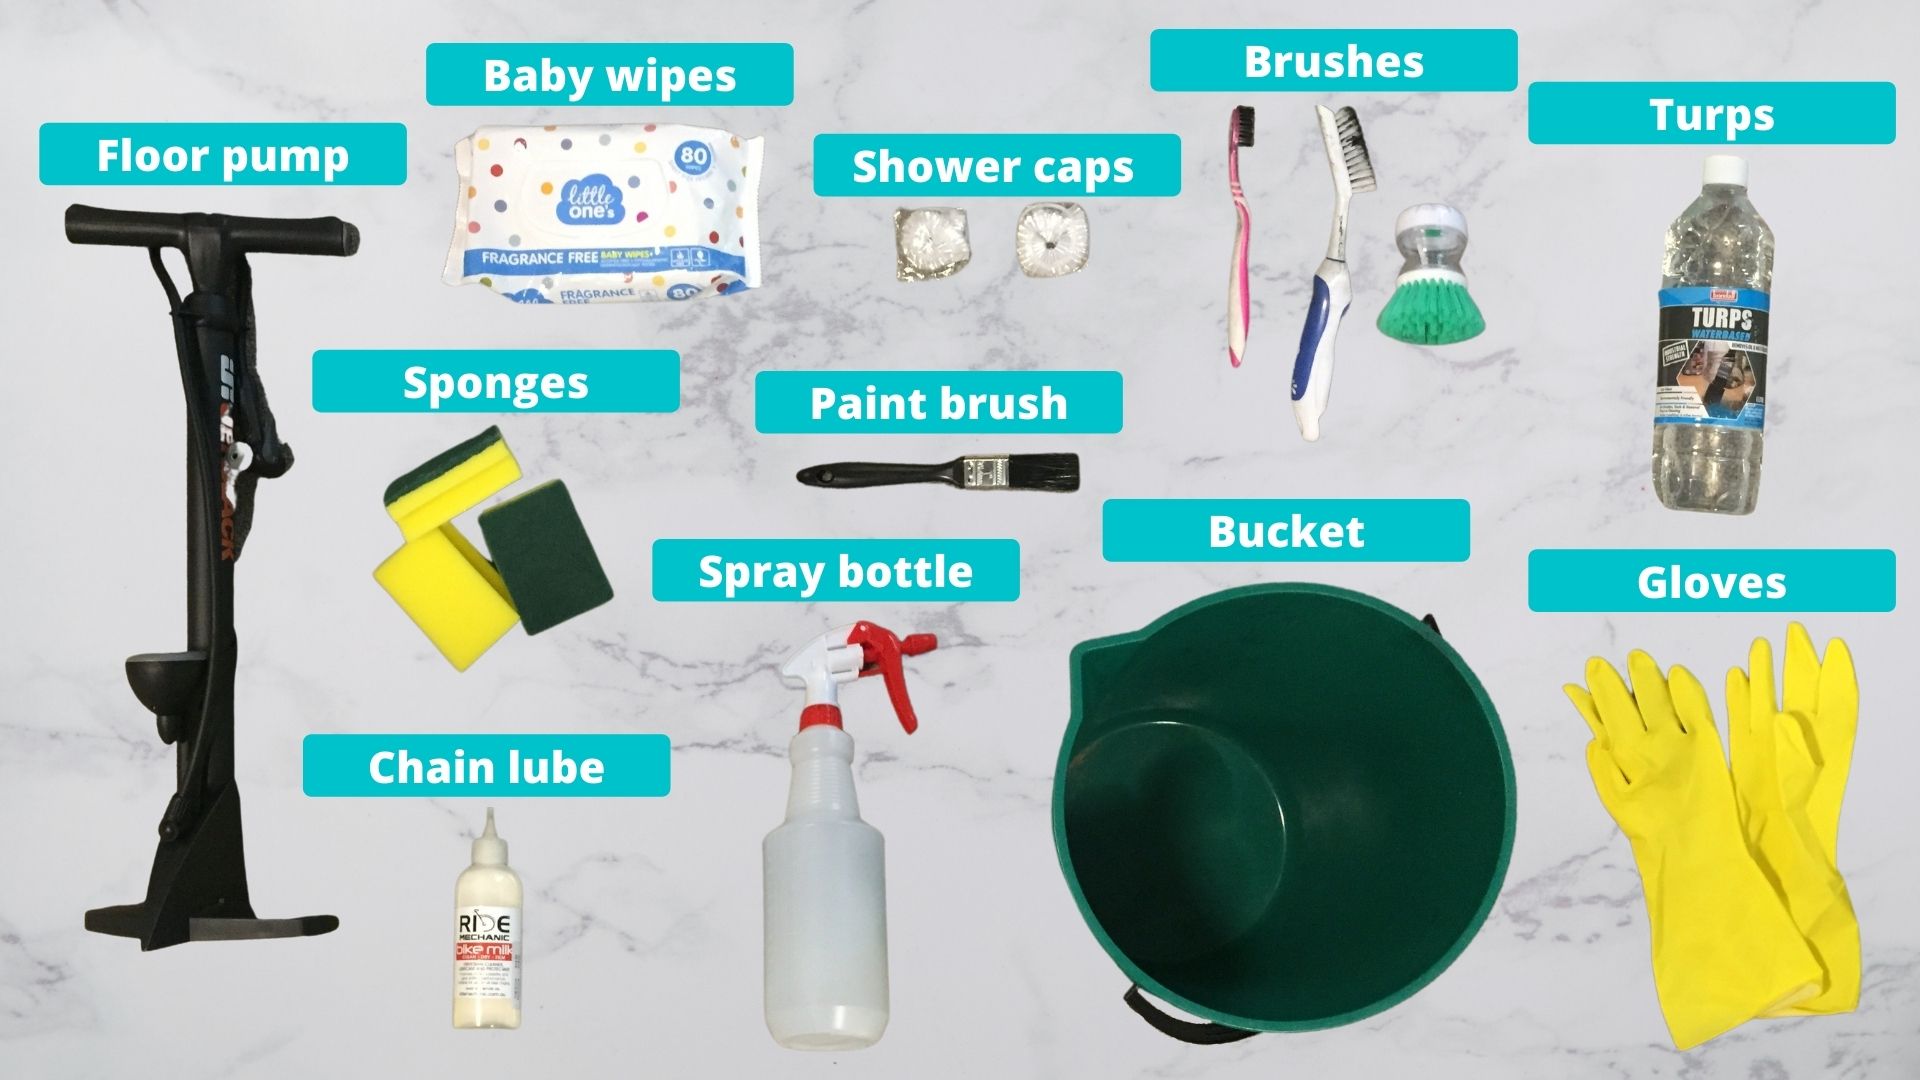
-
Floor pump (JetBlack Little Fella): For pumping up my tyres at home. The pump has a handy gauge which allows me to easily inflate the tyres to a specific pressure (around 80 psi in my case).
-
Chain lube (Ride Mechanic Bike Milk): To lubricate the chain. I usually do this after riding in the rain, after cleaning my bike, or otherwise after every 3-4 rides. There are two types of chain lube - wet or dry. Wet lube is designed for wet weather conditions - it is water resistant so won’t easily wash off in the rain, but its sticky nature can attract dirt and is generally messier to use. In contrast, dry lube is designed for dry or dusty weather conditions - it is cleaner to use and attracts less dirt build-up, but is less durable and will easily wash off in the rain. I chose a dry lube as I don’t tend to ride in the rain if I can avoid it.
-
Bucket: I fill a bucket with hot water and dishwashing liquid to clean my bike. I got a bucket for 96 cents from Bunnings, after a ride leader showed me this awesome video which teaches you how to create a budget bike wash kit for under $25.
-
Spray bottles: I don’t have a hose, so I usually fill a spray bottle with water and spray my bike frame before wiping it down more thoroughly. The spray helps dislodge any sand or dirt stuck to the bike, so I don’t scratch the frame when I wipe it down.
-
Baby wipes: As a beginner cyclist I frequently get what is known as a “chainring tattoo” - a black greasy mark on my right calf from accidentally touching the chainring (usually when straddling my bike while stopped). These marks are impossible to remove with just soap and water, which is where baby wipes come in handy. Some of my colleagues also recommend wiping down the chain after each ride with baby wipes, though I’ve found that an old t-shirt or rag works even better.
-
Sponge scourers: For wiping down the bike with hot soapy water. I always have three separate sponges going at any one time: a greasy old one for the chain, a moderately dirty one for the wheels, cranks and pedals, and a relatively fresh, clean one for the rest of the frame.
-
Scrubbing brushes: An assortment of brushes - including a grout brush, a medium bristle brush and an old toothbrush - to scrub and clean the chain, cogs and chainring.
-
Turps: A cheap, generic cleaning product that I use as an alternative to much more expensive, specialised bike drivetrain degreasers.
-
Paint brush: To apply degreaser onto the chain and jockey wheels.
-
Rubber gloves: To protect my hands while cleaning the bike.
-
Shower caps: To protect my disc brakes when degreasing the drivedrain - a neat little trick I learnt from the GCN YouTube channel. Disc brakes are prone to contamination by degreasers, oils or lube, so it’s important to protect them if you want to avoid squealing brakes. I didn’t actually have to buy any shower caps, as I have a big stash of them leftover from various hotel visits from pre-Covid times.
Recovery
-
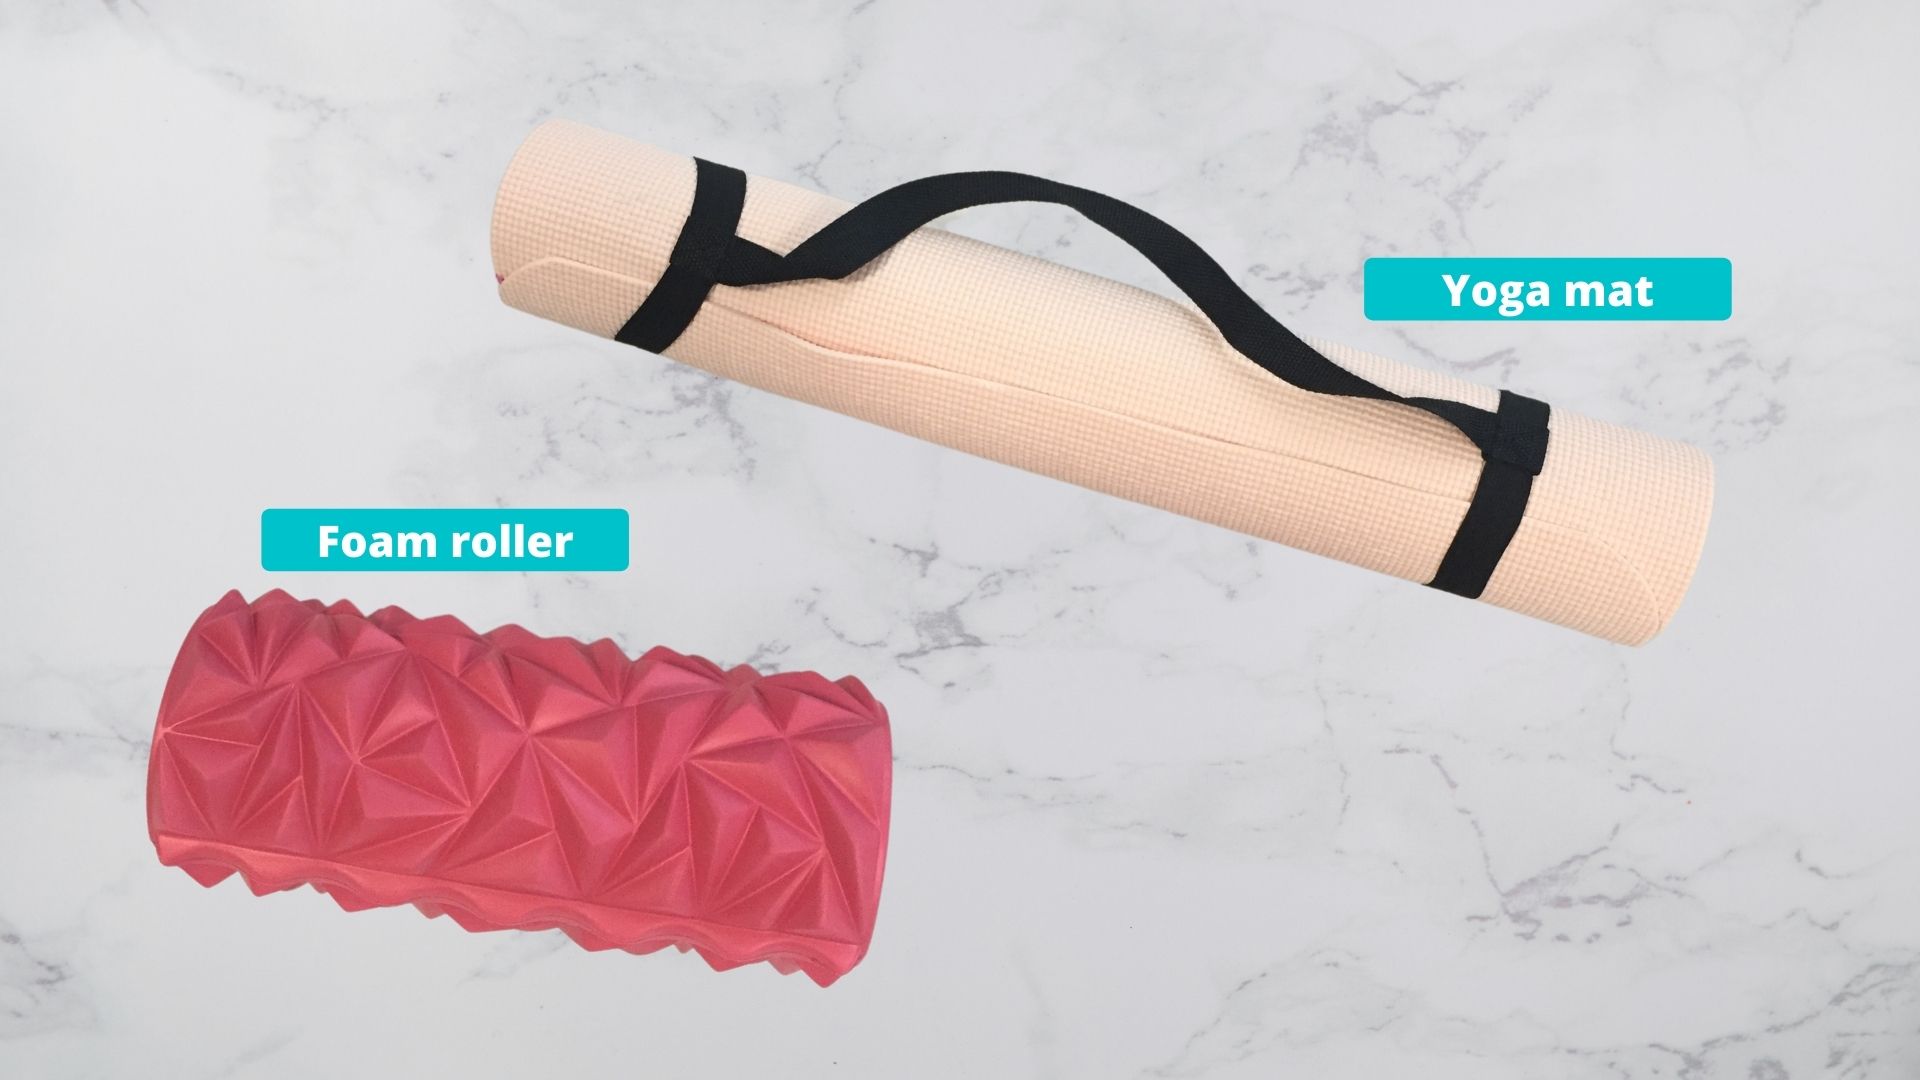
Yoga mat: After joining my very first - and in hindsight very mild - Sunday training ride in January, my legs (specifically my quads muscles) remained tight and sore for over a week. Back then I didn’t know anything about stretches. Then during my second Sunday ride, I had a conversation with Dat, a ride leader and multi-tour veteran, who explained to me the concept of Active Recovery. I learnt that when my muscles are tight and sore after a ride, I should not stay stationary for days afterwards and hope the pain goes away. Instead - and somewhat counter-intuitively - I should stretch and go on 5km walks and in general stay active and mobile, albeit gently. This helps flush the lactic acid away and prepares the body for the next ride. The yoga mat was one of my best purchases and I use it every day for my daily stretching routine, to aid recovery and improve flexibility.
-
Foam roller (MB Active by Michelle Bridges Deep Tissue): Dat also told me he uses a foam roller every other day, and highly recommended that I do the same. I consider him a very authoritative source, so I heeded his advice, bought a foam roller, and taught myself to use it by watching YouTube videos. Apparently the rolling motion helps release tension in the muscles and relieve soreness, though there is currently no scientific consensus on exactly how it all works. Since I started regular stretches and foam rolling, I’ve definitely noticed reduced recovery times, though I can’t say whether it’s at least partially due to a placebo effect!
